Visit this page often to find information on current projects and upcoming events for Art 6.
In Art 6 we will be exploring multiple art materials including; markers, oil pastels, tempera paint, colored pencils, felt with basic sewing and much more!
1 Pt. Perspective, Color Wheel Cityscapes
Colored Pencil Drawings
Here's what students should be able to say by the end of our project:
I Can:
- discuss the relationship between science and color theory.
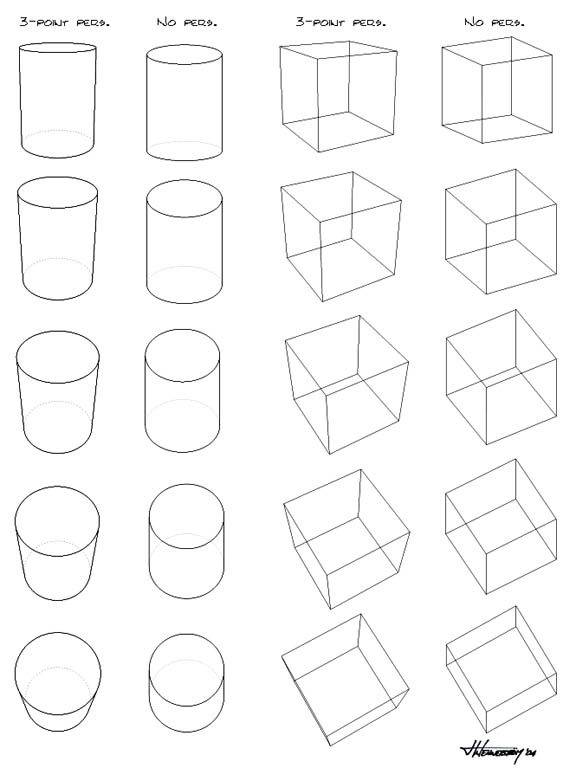
- create a 1 point perspective cube and cylinder.
- create the color spectrum by mixing colors.
- create value by applying shading.
- critique and improve my artwork as I create it.
During this lesson, students will be introduced to the element of art, Color.
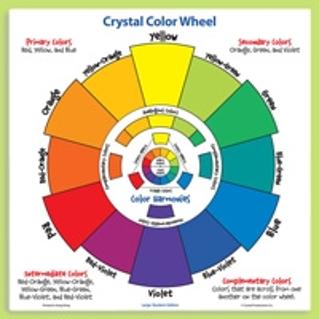
Students will learn about the 12 colors that make up the color wheel:
Primary Colors: Red, Yellow and Blue
The Primary Colors are the most important because they create all other colors!
Secondary Colors: Orange, Violet and Green
The Secondary Colors are created by mixing 2 primary colors.
Tertiary Colors: Yellow-Green, Yellow-Orange, Red-Violet, Red-Orange, Blue-Violet, Blue-Green
The Tertiary colors are created by mixing a Primary and secondary color together. It is very important to list the primary colors name first.
Once students learn how to "read" the color wheel they will know how to mix/create colors as well as what colors work well together.
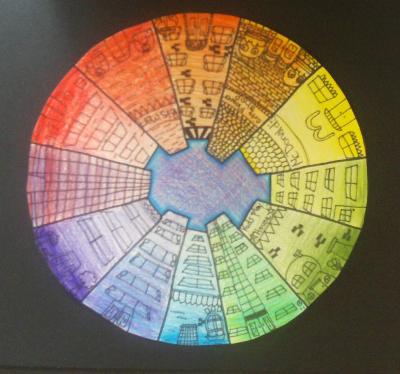
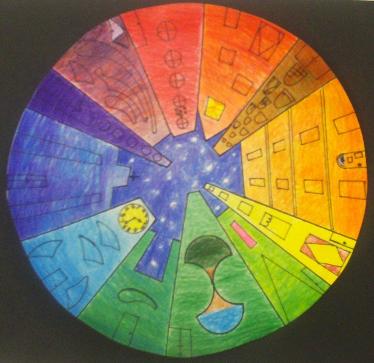
After students have learned the color wheel they will be introduced to drawing in 1 point perspective. This allows them to create "form", the illusion of something being 3-dimensional on their paper. They will then create a circular cityscape with 12 buildings using 1 point perspective. The buildings will then show the 12 colors of the color wheel and how they are created.
This project first introduces students to color theory and how it closely relates to Science and the electromagnetic spectrum. It also teaches them 1 point perspective drawing and creating value through shading.
Our bulletin board filled with important project information and objectives.
A Sample of what our
final color drawings will look like.
EXPLORE MORE
Click on the links below to learn more about the element of art, Color.
Color Matters A Great site that explores the Science, Symbolism and Design aspects of Color.
Color at the MET The Metropolitan Museum of Art helps students explore how to mix and create colors through this interactive site.
Coming Later! Landscapes
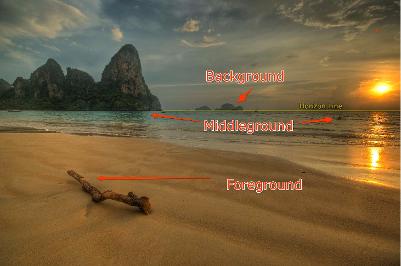
How to achieve a sense of space/depth
within your landscape.
Include the following within your composition:
Foreground: Area closest to the viewer that includes the most detail. Items in the foreground appear to be large. They are also the brightest in color.
Middle ground: area between the foreground and background
Background: Area furthest from the viewer, with the least amount of detail. Items in the background appear small. They are also the dullest in color.
Down the road, FELT MONSTERS
The felt monster project is here.
Students are learning about Fiber Arts and different forms of textiles (materials).
This is the first 3-dimensional project we have done. Students are taught that a 3-D object has the element of art, Form. They have to first create a 2-D sketch, and then create their 3-D stuffed monster from the sketch.
The textiles we use are felt, ribbon, pipe cleaners, buttons, pom poms and fabric. Students cut out and glue together all of their features and details. We will then hand sew the front and backs of the felt monsters togethe to stuff them.
The final step is for students to create a Designer Plush Tag for their monster. This is to include the monsters name and persona (story about it's personality) just like traditional Designer Plush doll does.
Images of the students monsters will be up soon!
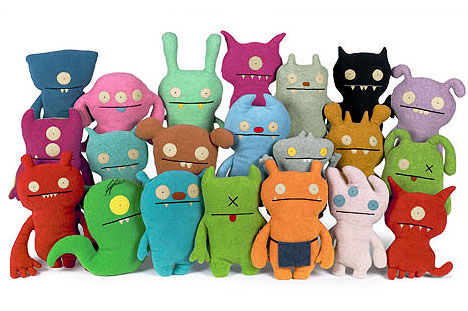
An example of Designer Plush Dolls can be seen above. (Ugly Dolls)